
Power Automate, formerly known as Microsoft Flow, is an online tool inside Microsoft Office 365 Business Premium and add-ins that allows users to create automatic workflows across apps and services to synchronize files, get notifications, and gather data. It is a new corporate solution from Microsoft that allows us to connect and synchronize all of our data analysis and apps in an automated manner, increasing productivity and business efficiency.
Power Automate allows you to design various process flows in which recurring actions are executed within Office 365 or third-party applications. This might involve data connectivity across Office apps, API access to compatible third-party applications, or even an automated action started from a local device like a PC.
Table of Contents
ToggleHow do I utilize Microsoft Power Automate?
Administrators may use Power Automate from the Office 365 admin Center and construct flows in three ways:
- Start from blank allows you to construct a bespoke flow that meets your needs.
- Start with templates allows you to design flows from preset templates offered by Microsoft.
- Start from connections allows you to design flows based on the applications you use on a daily basis. Connectors are apps that can use the Power Automate process to construct business flow templates.
This blog discusses all three methods and includes a sample flow construction using Microsoft’s popular templates. Because there are 100 templates and an increasing number of connections.
Example 1: Creating an automatic cloud flow in Microsoft Office 365 Business Premium
In this example, we’ll design an automated process flow that deletes a file from a Sharepoint library and sends an email to a Microsoft 365 Outlook-enabled user. The procedures for creating this automated flow are as follows.
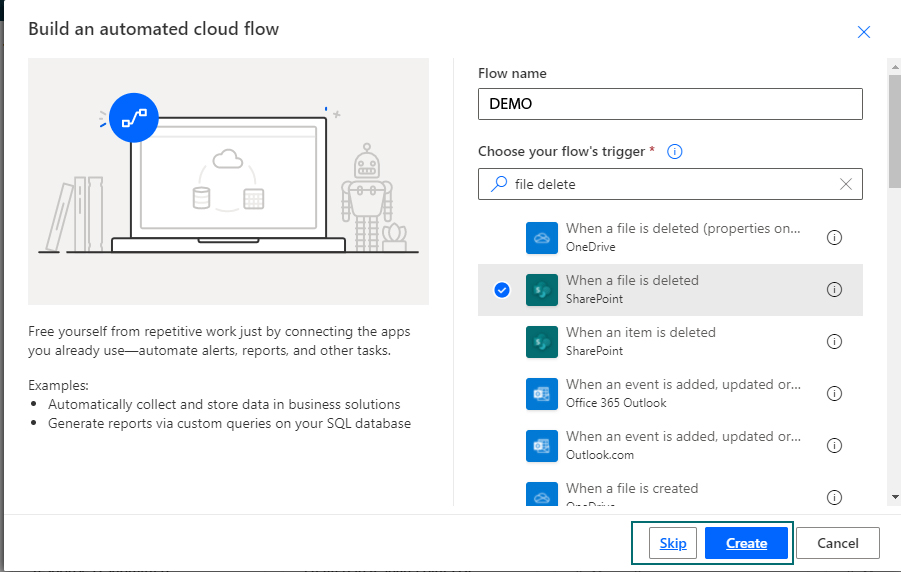
Select Automated cloud flow from the Power Automate → Create page. This will launch a new wizard; enter a Flow name into the Flow name box. In the “Choose your flows to trigger” search box, enter “file delete” to see all file deletion activities on Microsoft services (for example, a file delete in Sharepoint). To proceed, choose the trigger element “When a file is deleted – Sharepoint” and then select Create.
In this stage, provide the whole URL of your Sharepoint Site Address, as well as the Library name. You may pick a folder or leave it blank to choose the entire library. The screenshot below depicts this stage. To go forward, click the New Step button.

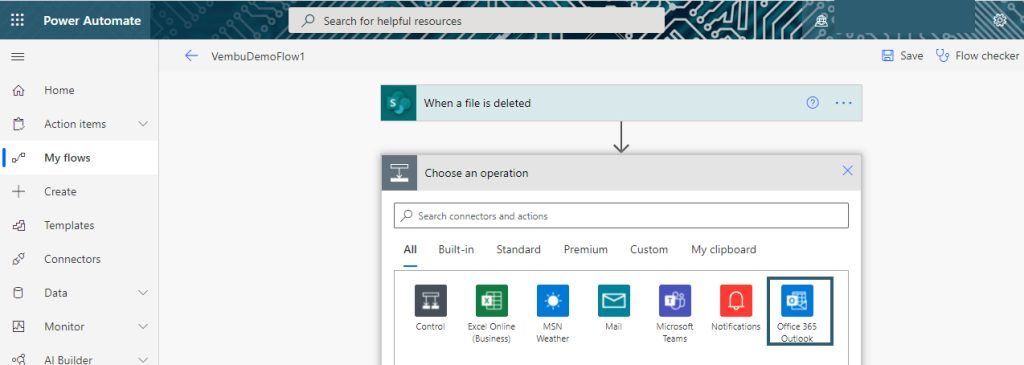
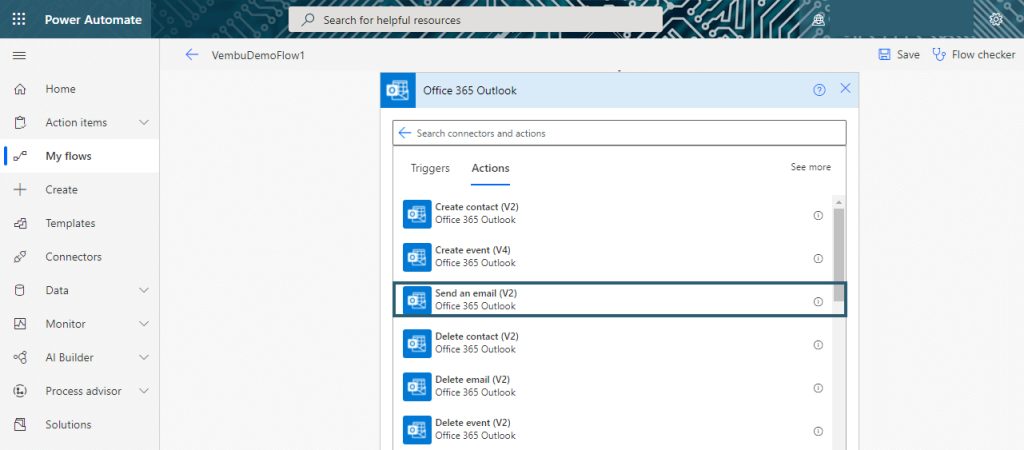
In this phase, choose the connections for the action. Since we will send an email for the file deletion action, Select the Office 365 connection (indicated in the red box in the first screenshot below), and then select the “send an email” option in Outlook. (Displayed in the red box in the second screenshot below).
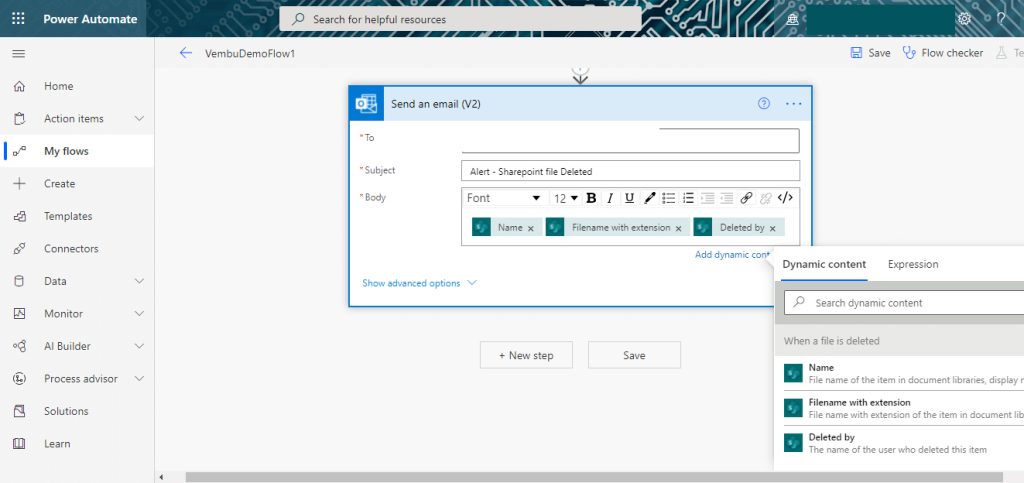
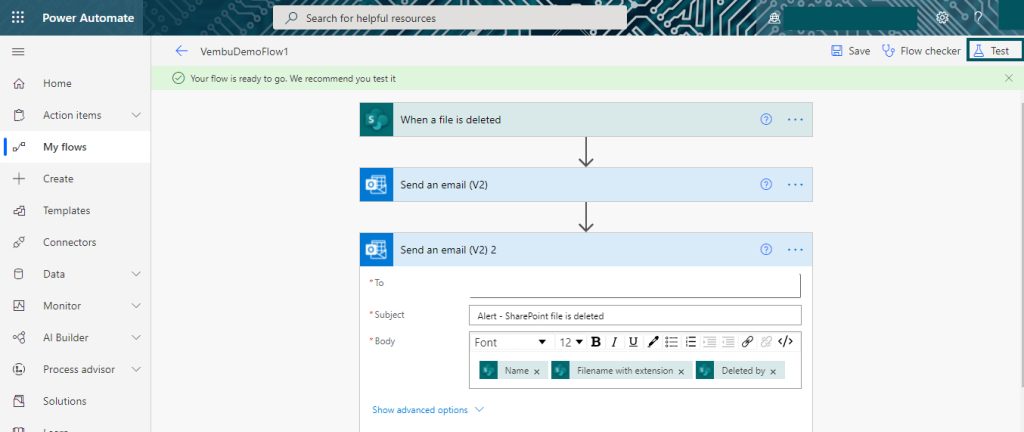
You can also include the “To” address, the subject, and the body of the message. You can add dynamic material here, such as the deleted document’s name, the name of the person who deleted the file, and so on. When one of your Organization SharePoint members deletes a file, you will receive a clear email message. Click save to create a new flow.
Now that your flow is ready, it is advised that you test it by clicking the Test button in the top corner of the page (seen in the red box in the picture below of Microsoft Office 365 Business Premium ).
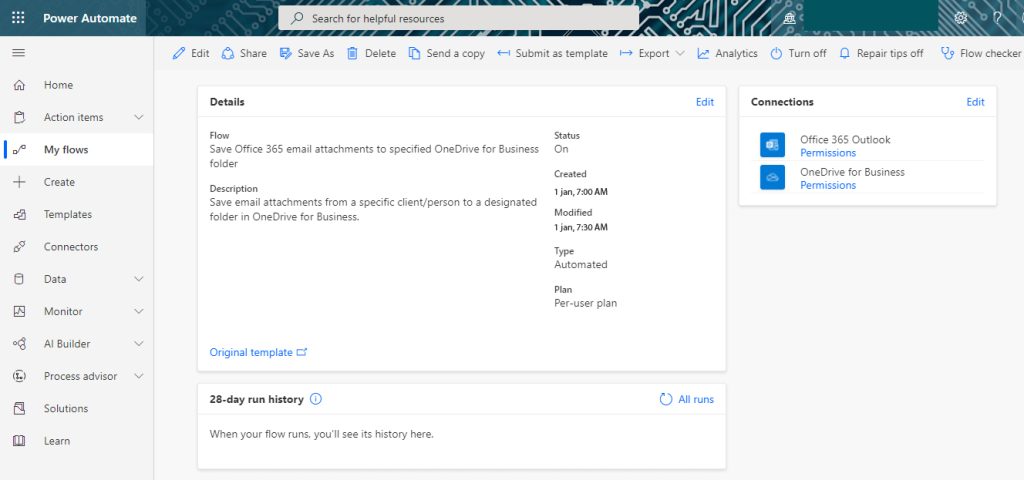
The screenshot below depicts the specifics of the flow “VembuDemoFlow1”. You can make changes to all of the settings as needed. You may also share, delete, create another copy, convert a template for later usage, export as a zip file, see historical run status, and switch off the flow if necessary.
Example 2: Using the OneDrive for Business template in Microsoft Office 365 Business Premium
As previously stated, in this example, we are constructing a flow in Microsoft 365 Power Automate using a template created by the Microsoft Power Automate community. This template automates the process of storing an Office 365 mail attachment to a selected OneDrive for Business folder. I’m automating the process of storing my Office 365 email attachment to a OneDrive for Business folder called VembuPowerAutomateDemo. The screenshots below demonstrate these specifics.
Click the Continue button to begin the procedure. To monitor your emails with attachments, navigate to your mailbox folder (typically Inbox) on the following screen. You may also utilize sophisticated settings to filter your incoming emails depending on the criteria you specify.
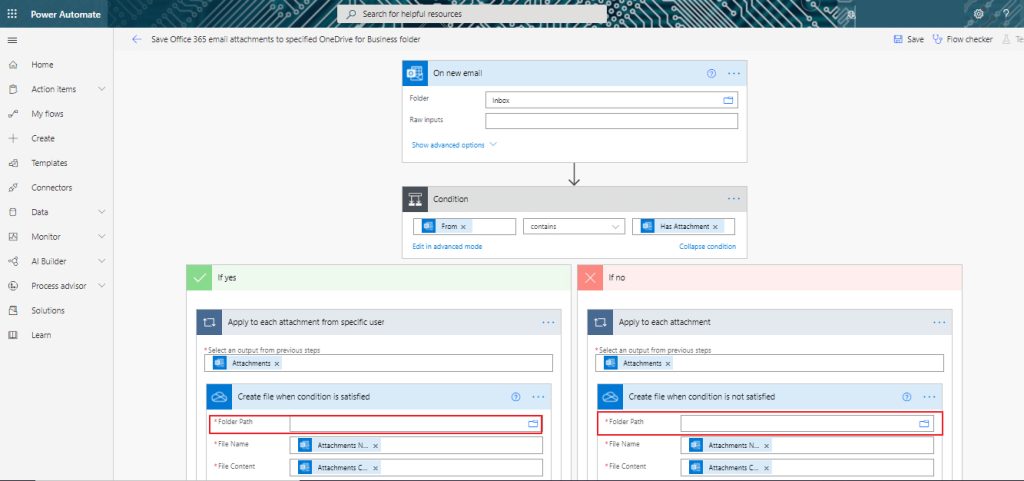
Select “Has Attachment” from the available trigger lists in the Condition box.
The flow displays two conditions, Yes and No, and requires inputs for both. So, to meet the requirements, we provide two folder locations for Yes and No. In the “Folder path location” field, we must explore the complete path of the Directory in OneDrive storage, as shown in the picture.
To construct the flow, click the Save button, and then test it by clicking the Test symbol at the top right of the page.
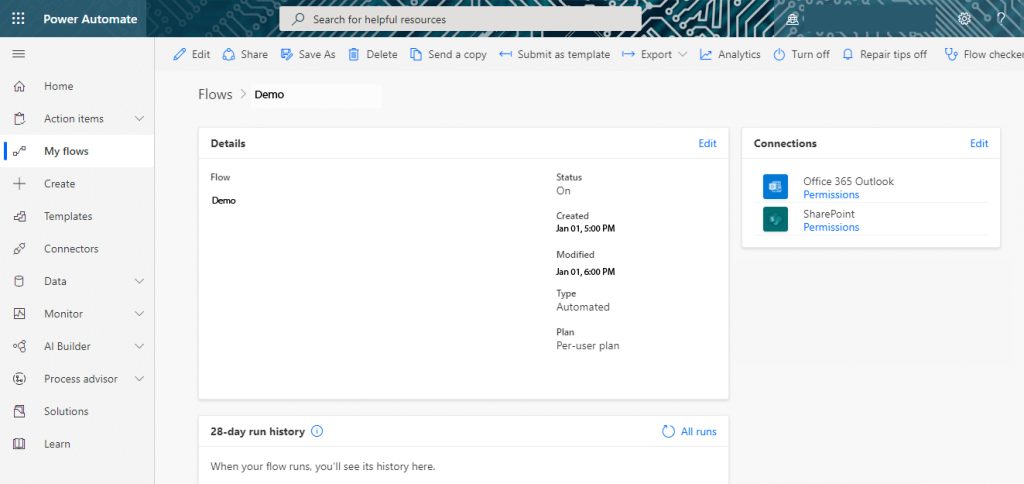
All of the flows you developed are available in the “My flows” section. You may alter the flow you generated after choosing it, as seen in the screenshot. You may also share, delete, create another copy, convert a template for later usage, export as a zip file, see historical run status, and switch off the flow if necessary.
Conclusion
Finally, Microsoft Office 365 Business Premium provides a comprehensive solution for automating workflows, optimizing operations, and increasing organizational efficiency. Office 365 Business Premium, with its easy interface, robust integration capabilities, and wide feature set, enables users to automate everyday operations, interact smoothly, and focus on what is actually important: driving growth and innovation. Businesses that fully use automated processes in Office 365 Business Premium may achieve new levels of productivity, agility, and success in today’s changing digital world.